


💳 Introduction to Wise in New Zealand (The Ultimate Guide)
Whether planning a road trip through the breathtaking South Island, exploring the vibrant streets of Auckland, or immersing yourself in the Maori culture, a journey to New Zealand will surely be the adventure of a lifetime.
However, as a traveler, you’ll need to manage your finances efficiently, which often includes transferring money to New Zealand.
This article explores the need for money transfers, the Wise app (formerly known as TransferWise), and how it can simplify your financial transactions while providing significant cost savings.
We’ll also guide you through setting up your Wise account, making your first transfer, tracking your transfers, and getting the most out of the app during your New Zealand travels.
1. Understanding the Need for Money Transfers in New Zealand
As a traveler exploring the beauty of New Zealand, you’ll likely find yourself in various situations where you need to transfer money. These scenarios range from paying for accommodations and dining to funding exciting tours and activities.
While New Zealand is known for its modern banking infrastructure, international money transfers can still pose challenges, particularly regarding the costs involved.
Traditional banking methods typically come with hidden fees, unfavorable exchange rates, and a need for more transparency.
These factors can significantly impact the amount you receive in New Zealand dollars (NZD) and, as a result, affect your overall travel budget.
To overcome these challenges, travelers turn to fintech solutions like the Wise app to make their money transfers more straightforward, transparent, and cost-effective.
2. The Wise in New Zealand App — A Game Changer for Travelers
The Wise app is designed with the user’s convenience in mind. Its intuitive interface allows travelers to easily manage their finances, send money, and receive payments.
With a strong focus on transparency, Wise in New Zealand aims to eliminate the hidden fees and uncompetitive exchange rates associated with traditional banks and money transfer services.
Before starting this step-by-step guide, we recommend registering with Wise using an affiliate link. It allows you to do your first transfer for FREE.
👉 Register & Download the Wise App

3. The Benefits of Using Wise in New Zealand
| Benefits | Description |
|---|---|
| Lower Fees and Competitive Exchange Rates | — Transparent fee structure — Competitive exchange rates — More money arrives in New Zealand, maximizing your budget |
| Transparent Fee Structure | — Clear and upfront pricing — Lower fees compared to traditional banks and competitors |
| Real-Time Exchange Rates | — Always know the exact amount you’ll receive in NZD before transferring — No hidden surprises |
| Multi-Currency Account | — Convenient for managing multiple currencies — Useful for travelers visiting multiple countries or dealing with different currencies in income and expenses |
4. Setting Up Your Wise Account
Now that you understand the benefits of using Wise in New Zealand, let’s set up your Wise account.
Step 1: Download the Wise App
Start by downloading the Wise app from the App Store or Google Play Store. The app is available for iOS and Android devices and is free to download.
Step 2: Sign Up
Once the app is installed, open it and sign up for a Wise account. You’ll need to provide some basic information, including your name, email address, and a strong password.
After creating your account, you’ll receive a confirmation email.
Step 3: Verify Your Identity
To comply with New Zealand’s financial regulations and ensure the security of your transactions, Wise will ask you to verify your identity.
You can submit a photo of your identification, such as a passport or driver’s license, directly through the app. The verification process is quick and straightforward.
Step 4: Add Your Payment Method
You’ll need to link a payment method to fund your Wise account and make transfers. Wise accepts various payment options, including bank transfers, debit or credit cards, and more.
You can choose the best method and follow the app’s instructions to link your account.
Step 5: Start Transferring Money
Once your account is set up, you can transfer money to New Zealand. In the next section, we’ll guide you through making your first transfer.

5. Making Your First Transfer
Now that your Wise account is up and running, let’s walk through the step-by-step process of making your first transfer to New Zealand.
Step 1: Log into Your Wise Account
Open the Wise app and log in using the credentials you provided during the account setup.
Step 2: Create a New Transfer
You’ll find an option to create a new transfer in the app. Click on this option to start the process.
Step 3: Add a Recipient
You’ll need to add the recipient of the funds. In this case, it could be a local business, your accommodation provider, or anyone you need to send money to in New Zealand.
You can add their details directly within the app, including their name and bank account information.
Step 4: Choose the Transfer Amount and Currency
Specify the amount you wish to transfer and the currency you’re sending from. Wise supports a wide range of currencies so that you can easily send money from your home currency to NZD.
Step 5: Review and Confirm
Before finalizing the transfer, Wise will provide a detailed breakdown of the fees and the amount received in NZD.
Take a moment to review this information, and when you’re satisfied, confirm the transfer.
Step 6: Pay for the Transfer
Wise will ask you to pay for the transfer using your linked payment method. Follow the prompts to complete the transaction.
Step 7: Tracking Your Transfer
Wise’s tracking feature allows you to monitor the status of your transfer in real-time. You’ll receive notifications when your money is sent, received, and completed.
This transparency provides peace of mind and ensures you’re always in the know.

6. Getting the Most Out of Wise in New Zealand
Wise offers several features and functionalities to enhance financial management during New Zealand travels. Here are some tips for getting the most out of the app:
Use Wise for ATM Withdrawals
While in New Zealand, you can use your Wise account to withdraw cash from ATMs, just like a regular bank account.
Ensure you have a balance of NZD in your Wise account, and you can withdraw funds as needed.
Make Payments with Wise
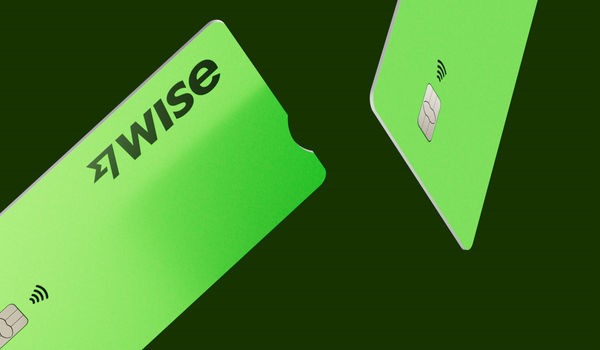
You can also use your Wise account to pay for various New Zealand businesses and merchants. Transfer the required amount to your Wise account, and you’ll be ready to spend with your Wise debit card or by making bank transfers directly from the app.
Split Bills with Friends
Wise allows you to split bills and expenses efficiently if you’re traveling with friends or family. You can transfer funds to each other’s Wise accounts and keep track of shared costs.
Consider Wise’s Borderless Account
Wise in New Zealand offers a unique feature known as the Borderless Account, which allows you to hold multiple currencies in a single account.
With a Borderless Account, you can receive payments in different currencies, convert them at the mid-market rate, and manage your international finances more efficiently.


